Authors: © Nailya Safarova, © Denis Svinarchuk, © Pavel Kosenko, © Dmitry Novak
Digital correction with analogue soul
Optical printing process involves special photo enlargers with color head. Substractive color correction head is a commonly used tool integrated in many enlargers with the same operation principle.

Typical enlarger color head is based upon three filters set meant to colorise the light during the exposure of photopaper:
- Yellow
- Magenta
- Cyan
Each filter slides smoothly into a prismatic shaft with mirror walls to a certain depth, from zero (fully open, i.e. filter doesn’t enter the shaft) to maximum (fully closed, i.e. fully inserted filter).
Color filters inside the head evenly colorise the light through multiple mirrors and special matte screens, substracting unneeded spectral components. Thus, the color correction process is called substractive.
A neutral density filter can also be found in most advanced enlargers. It doesn’t affect the color and is used for exposure correction only, along with exposure time and aperture setting on the enlarger lens.
The similar method is implemented in Printer Lights – a special tool for color correction for analog printing from negative movie film to the positive. The main difference is that the print film is exposed to light with different intensity of red, green and blue components. White light is split to its spectral components, filtered to substract unneeded colors and is assembled back into a single colored flux. That is, in fact, the color correction is done in a substractive way.
Analog color correction with Color Head (photography) and with Printer Lights (movie production) have the same principle – changing the color of light used for print media exposure. In the first case it is done with YMC light filters, in the second case – with the RGB components intensity adjustment. In essence, it is the same substractive method but with inversed colors, which can be represented as YMC-BGR color pairs:
- Yellow — Blue
- Magenta — Green
- Cyan — Red
For most specialists CMY-RGB sequence is more usual to hear. In fact, it is the same as YMC-BGR, but with colors presented in a different order.
Usually color head controls are arranged as YMC, with BGR complementary colors. However, intensity corrections in Printer Lights equipment are usually arranged in an RGB sequence, which corresponds to the CMY complementary pairs.
Dehancer CMY Color Head
We took the real Color Head equipment as a concept for our ‘analogue’ tool because it’s closer to the substractive color correction principle itself. Also we have the more familiar CMY color notation sequence as an inversion of RGB. As a result, our tool has a hybrid name CMY Color Head (instead of YMC Color Head, which technically would be more correct).
We will talk further about the principles of analogue color correction in terms of optical photo printing with Color Head. However, in essence it is the same as the movie production tool called Printer Lights, simply with complementary color names.
To simplify the Color Head tool for colorists we decided to use double naming. This helps you to think in terms of Color Head and Print Lights simultaneously.

In the process of negative film printing, the effect of filters is the opposite of what is expected. For example, if you add the yellow filter, i.e. push it into the head shaft (positive values of ‘Yellow – Blue’ slider), the photo paper will be exposed to a yellower light. In terms of the negative process, the print will become less yellow, i.e. more blue, after paper development. Similar changes occur when other filters are used.

Source image without correction
The original analogue correction process with color head filters not only changes the light color but also affects the exposure value. When any color filter slides into a shaft the total amount of light falls and therefore the exposure decreases. Accordingly, the developed final print becomes lighter.
For example, using the yellow filter makes the light more yellow while reducing the overall light intensity. Accordingly, the print will turn blue and at the same time lighter (less dense).
The opposite is also true. When any filter is pulled out of the prismatic shaft, the total amount of light increases, which means the exposure increases.
For example, pulling out a yellow filter makes light less yellow and simultaneously increases the overall amount of light. Accordingly, the print turns yellow and at the same time darker (denser).
During the analogue printing process the total exposure is corrected along with the change of color filter values. Then the exposure time or the lens aperture is adjusted, or the Color Head neutral light filter is used (less common way).
We have a dedicated control Preserve Exposure that automatically compensates exposure during color correction when set to 100%. Then any changes of YMC values won’t affect the overall image brightness.
However you may put Preserve Exposure slider to zero. With this setting YMC adjustment results in the exposure changes – just the way it does with the analogue printing process. This is an additional way to naturally change the image density in Dehancer.
Please watch this short demo to see how Dehancer Color Head behaves in live action:
Color Head imitation with DaVinci built-in tools
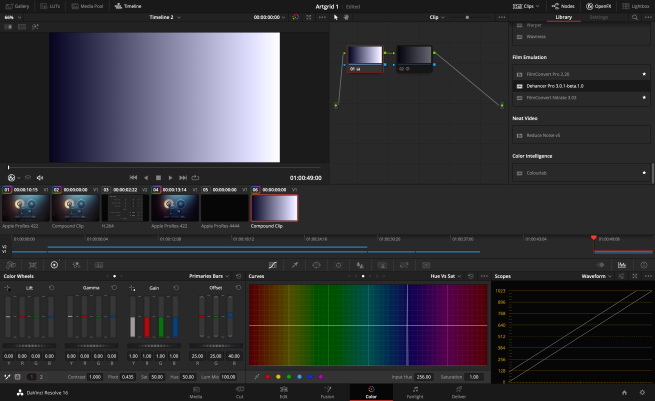
Offset in Primaries Bars is the closest alternative to Dehancer Color Head.
We’ll use the neutral gradient image to visually compare both tools. One color component study is enough to see the effect. Note how the waveform changes depending on the Blue values.

Source image without correction
And this is how the waveform behaves with a similar color correction done in Dehancer Color Head (Preserve Exposure = 0):
At first glance, the results are rather similar, but if you look closely, you can see the difference. In case of Dehancer, color changes occur not in one channel, but at least in two. This is explained by the fact that the technology behind the Color Head tool is based not on abstract digital filter values, but on the instrumentally measured real-life color filters. This makes the color correction process more analogous. The more filters are involved in the correction process, the more obvious the difference is.
By the way, when you make identical changes of all three sliders in Dehancer Color Head, the color of the image changes, although in the ideal digital world this should not happen. The real-life values of color filters are the true reason for this behaviour.
For your convenience, we have provided the Gang checkbox, which links the color sliders together and allows you changing all three filters at once.
The other difference between Dehancer Color Head and Offset Primaries Bars is even more significant. As soon as we set Preserve Exposure to 100, a non-linear ‘analogue’ color change is visible on the waveform. In order to see it clearly, we used extreme correction, for example, ‘Cyan – Red’ filter is set to the maximum value.
Substrаctive color correction is widely used in photography and film industry, including digital image processing, which can be proved by Color Wheels / Primaries Bars / Offsets tool in DaVinci Resolve.
The Color Head tool in Dehancer naturally complements film profiles, as negative film always requires color interpretation during the printing stage. In movie production, color correction is also possible while printing to positive film.
Each grading version that you get with the ‘Film Profile + Color Head’ combo is lifelike, i.e. as close as possible to what you can get with the real optical printing process.
Additionally, Color Head works more faithfully than similar digital tools because it takes into account the real physical processes that occur when working with film.
Usage Examples
So far, we have mostly studied abstract images. Here are a couple of real-life examples of Color Head usage.

Source image (Kodak Vision 3 250D film profile)

Same shot with Color Head correction applied

Source image (Kodak Vision 3 250D film profile)

Same shot with Color Head correction applied

Source image (Fujichrome Velvia 100 film profile)

Same shot with Color Head correction applied
White Balance vs Color Head
ЧA frequently asked question is: what is the best practice for the basic color balance correction – using the white balance setting in DaVinci Resolve or with Color Head in Dehancer?
It is crucial to understand that these are different tools, and they work differently.
We encourage you to treat the white balance setting more as a technical tool for matching the color temperatures of the ‘film’ and the light source. While Color Head is a tool for creative interpretation of the image when ‘printing’. However, you are free to use these tools in a creative way in any combination.
Read more about how Dehancer works in other articles.
Download actual Dehancer version:
https://www.dehancer.com
For a 2-week Promo license, please request to [email protected].


