
Dehancer Film plugin for Adobe Photoshop and Lightroom Classic is currently available only for macOS. Windows release will be announced later. Please, register on our website so you don’t miss the good news.
- Downloading and choosing the right package
- Installation. Dehancer Film for Adobe Photoshop (macOS)
- Installation. Dehancer Film for Adobe Lightroom Classic (macOS)
- Working with photos in RAW
Downloading and choosing the right package
1. Make sure that your computer meets the system requirements for the plugin to work correctly.
2. Download the latest version of the plugin from www.dehancer.com.
3. Unzip the downloaded zip file, if your system didn’t do it automatically:
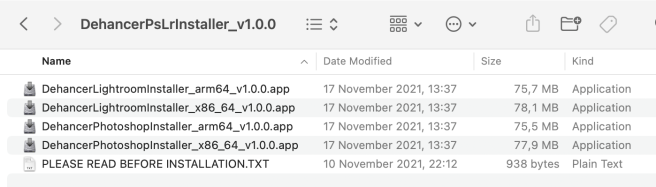
4. Select the appropriate distributive. The file name contains the host application (Photoshop or Lightroom) and the compatible CPU type:
- x86 — for Intel-based macs
- arm64 — for Apple Silicon M1
5. Run the selected installation file and follow the instructions.
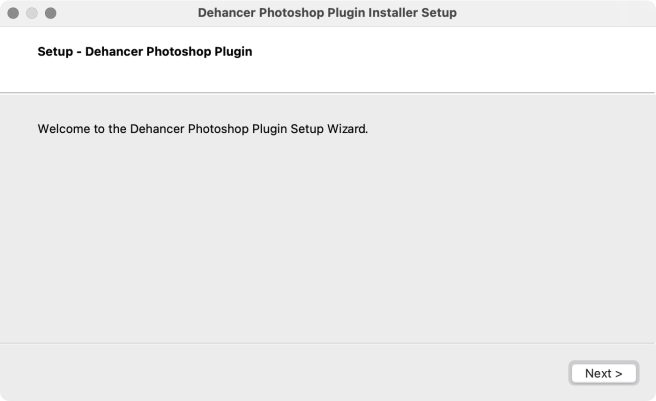
After the installation is complete, follow the instructions for your host application
Dehancer Film for Adobe Photoshop (macOS)
6. Launch or restart Adobe Photoshop if it was already running.
7. Open any photo you would like to process with Dehancer. Note that your file must be presented in the sRGB color space to be displayed and processed properly. Support for other color spaces will be added later.
8. Select the plugin in the Photoshop menu: Filter → Dehancer → Dehancer Film.
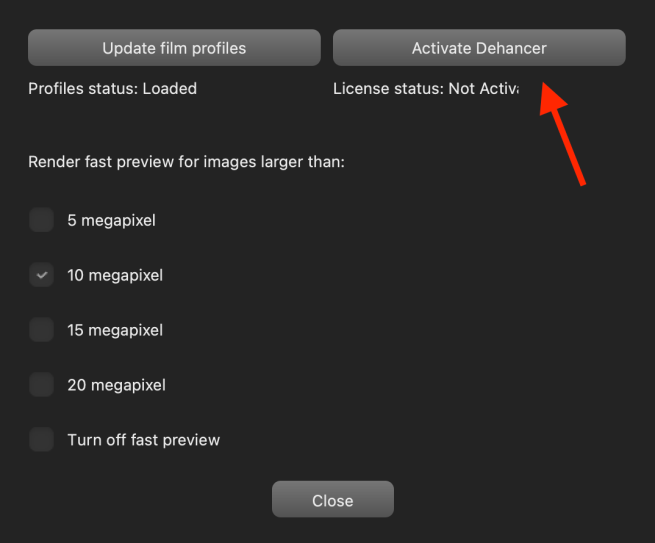
9. At first launch, the Settings window will open automatically. You can also open the Settings at any time by clicking on the gear icon in the toolbar.
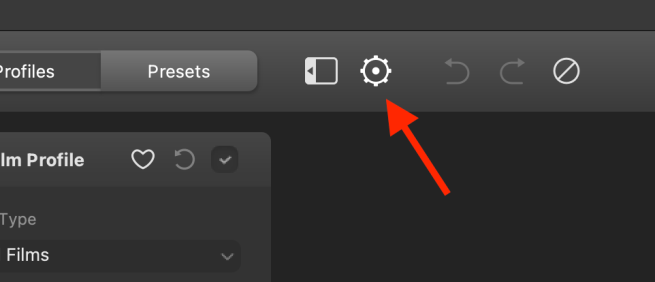
10. Use the button Update Film Profiles to download the profiles the first time.

11. Now Dehancer is ready to use.
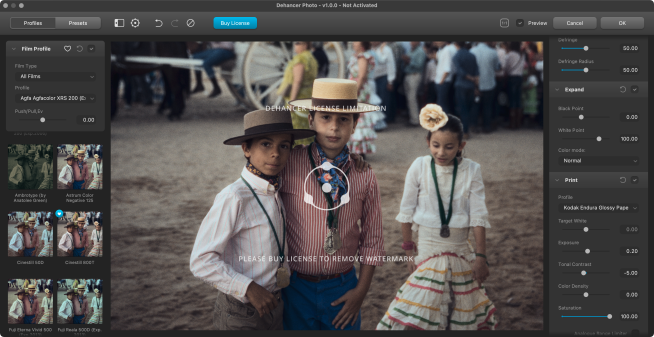
12. To remove the watermark, buy the License or a href=”https://www.dehancer.com/#download”>get the free 2-week trial on our website. The License will be automatically sent to your account email and displayed in your User Profile as well.
Each License contains Activation Keys for two workstations (seats). Each Key activates both plugins – Adobe Photoshop and Adobe Lightroom.
13. Launch the Activation widget.
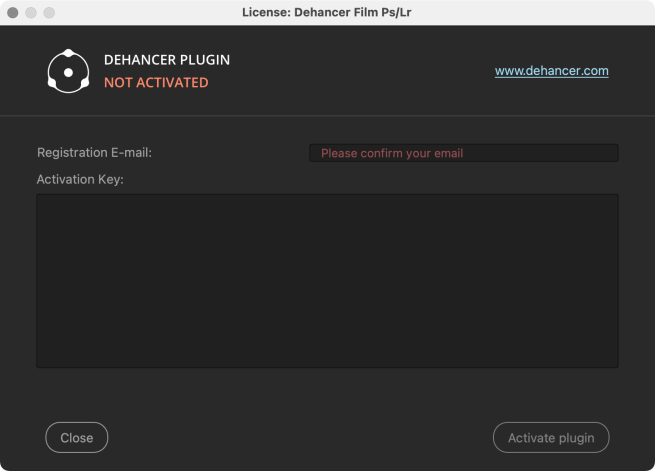
14. Enter your email and Activation Key, then press the Activate plugin button.
15. Enjoy!
Dehancer Film for Adobe Lightroom Classic (macOS)
6. Launch Adobe Lightroom. If the program was already running, you don’t need to restart it.
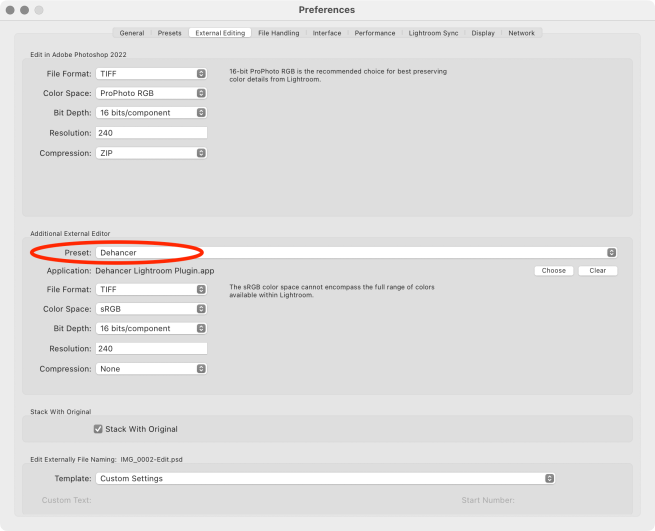
7. Go to Preferences → External Editing and click Choose to add Dehancer as an external editor.
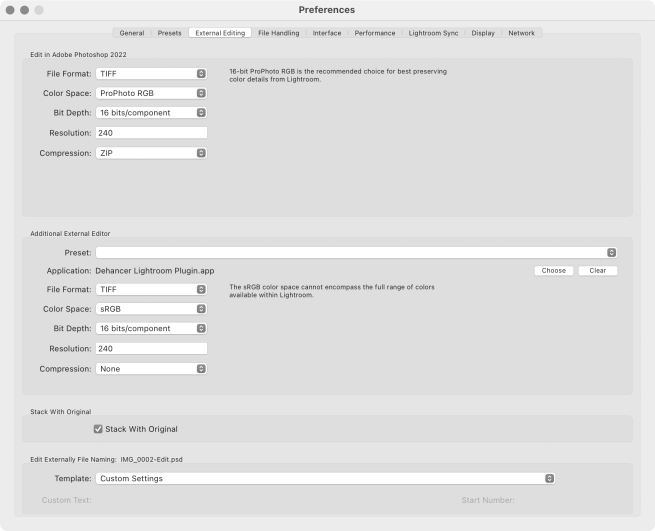
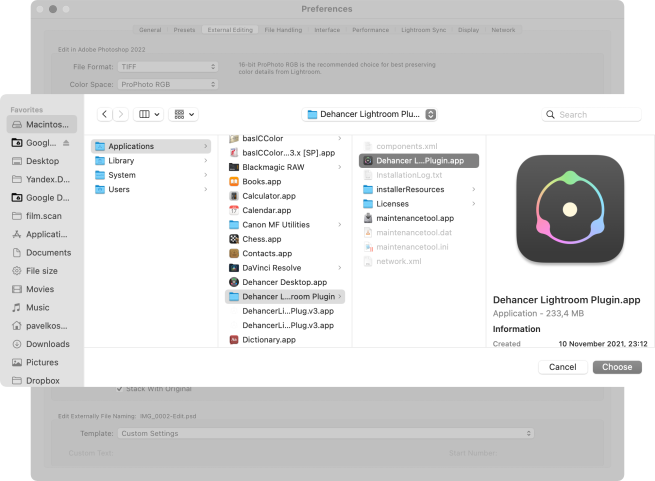
8. Specify the path to the installed Dehancer plugin:
Macintosh HD → Applications → Dehancer Lightroom Plugin → Dehancer Lightroom Plugin.app
9. Make sure that the plug-in is selected as an external editor.
10. Choose the photo you want to process, right-click on it and select the Dehancer plugin.

Note that your file must be presented in the sRGB color space to be displayed and processed properly. Support for other color spaces will be added later.
11. At first launch, the Settings window will open automatically. You can also open the Settings at any time by clicking on the gear icon in the toolbar.
12. Use the button Update Film Profiles to download the profiles the first time.
13. Now Dehancer is ready to use.
14. To remove the watermark, buy the License or get the free 2-week trial on our website. The License will be automatically sent to your account email and displayed in your User Profile as well.
Each License contains Activation Keys for two workstations (seats). Each Key activates both plugins – Adobe Photoshop and Adobe Lightroom.
15. Launch the Activation widget.
16. Enter your email and Activation Key, then press the Activate plugin button.
17. Enjoy!
Working with photos in RAW
RAW files for further editing in Dehancer can be processed in multiple ways:
1. Using the Photoshop built-in engine (ACR – Adobe Camera RAW)
We have observed that color rendering in ACR / Lightroom leaves much to be desired, but an acceptable result can be obtained with the following settings:
Profile: Adobe Standard
Exposure: –1
Contrast: –40
Blacks: +60
Curve: Linear
Sharpening = 0
Noise Reduction = 0
Color Space: sRGB IEC61966-2.1
Bit Depth: 16 bit.
If you are shooting with an iPhone and using Apple ProRaw DNG, try setting the Amount value for the Apple ProRaw profile to zero. Thus you will reduce the automatic Apple algorithms that are not always reliable (but still, sometimes acceptable). Meanwhile, we recommend setting the Sharpening value in the Detail tab to zero in order to prevent oversharpening.
Note that any RAW photo can be opened with the Open As Object option. The smart object will be created and Dehancer will be applied as a Smart Filter, which allows you to easily access both the RAW settings and the plugin’s parameters at any time.
2. Third-party RAW converters
For instance C1 (Capture One Pro) combined with Linear curve, and RPP (Raw Photo Processor) with Colorimetric Gamma mode produce good results. You can also use any other RAW converter.
When processing the RAW photos, we recommend:
- correct the most severe deviations in exposure and white balance
- use the Linear contrast curve if possible, avoiding clipping in shadows and highlights
- disable noise reduction and sharpening
- avoid any local contrast enhancement which might cause visible halos
- export files in sRGB TIFF 16 bit format