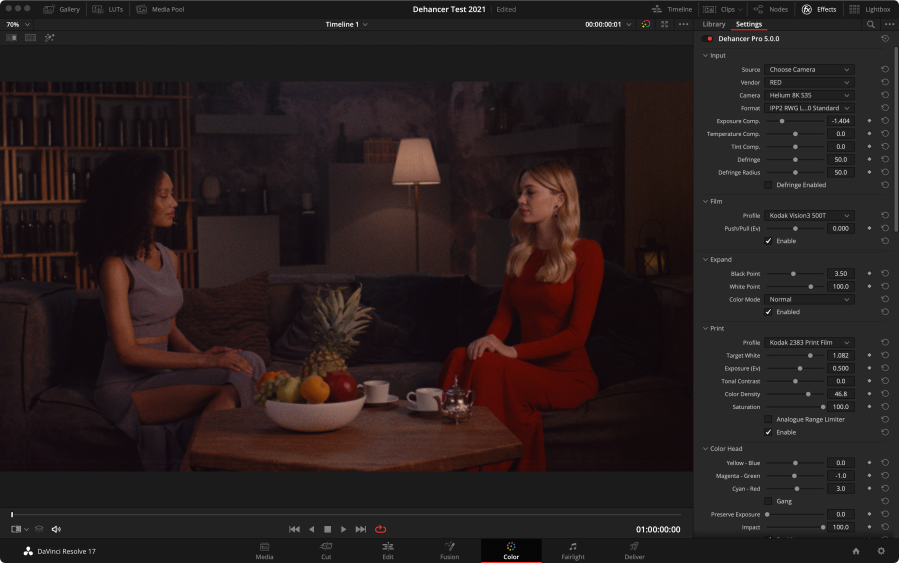
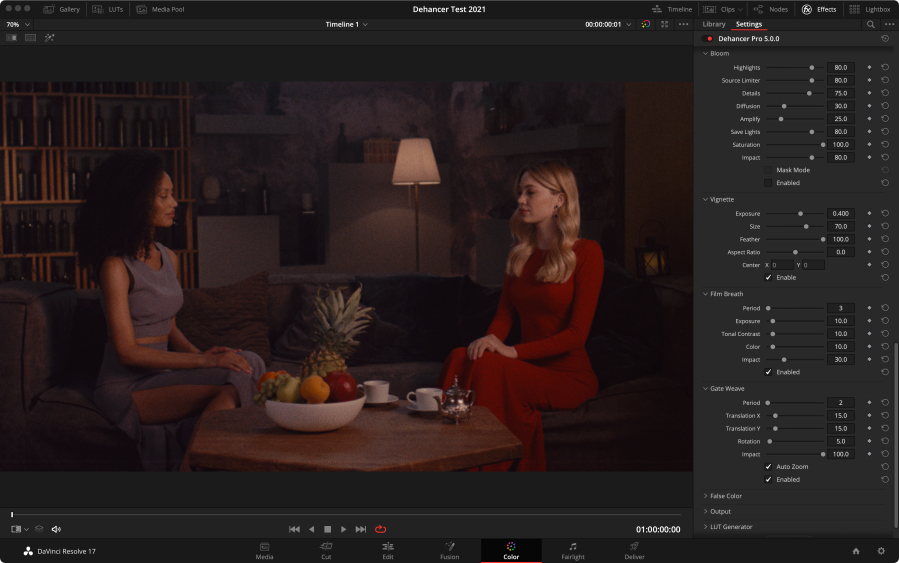
We are pleased to share with you the results of an experiment recently performed by the Dehancer team. The goal of this project was to verify whether it is possible to simulate film completely by means of the Dehancer Pro OFX Plugin, with minimal or no use of the other color correction tools in DaVinci Resolve.
To shoot this test scene on film and digital at the same time, we rented a studio, a cinematic lighting, a film camera, several digital cameras, invited a camera operator, a gaffer, camera mechanics, models, and a makeup artist. In addition to the film crew of 14 people the experiment also involved:
- Arriflex 416 + Kodak Vision 3 500T 16 mm film
- Blackmagic Pocket 6k (Film Log with Gen5 Color)
- Red Epic (IPP2)
- Kinefinity Mavo LF (CinemaDNG)

The primary light sources used in this shoot were 3200K (Tungsten).
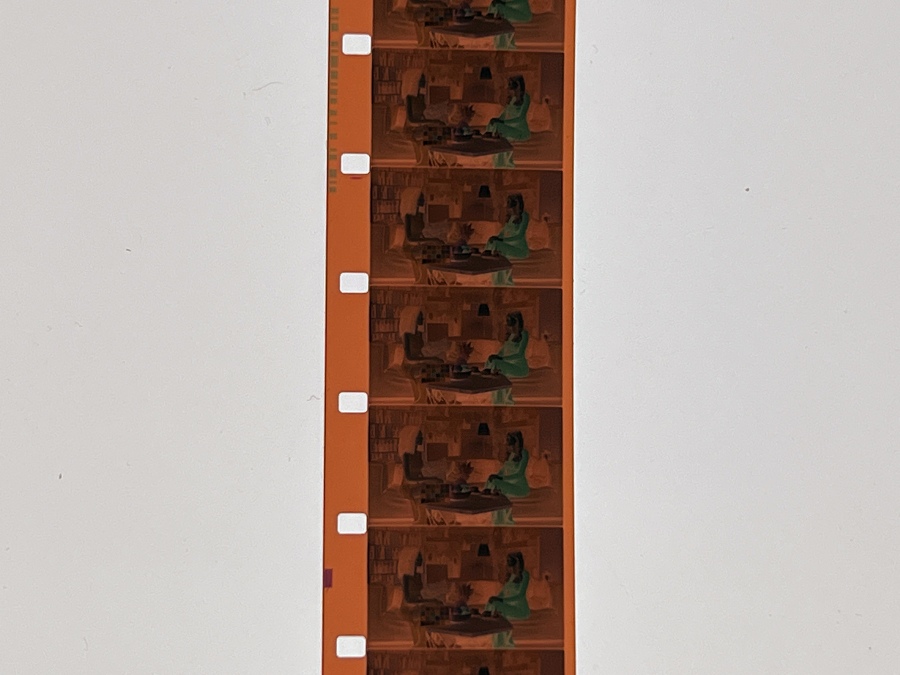
The film was developed and scanned in the laboratory at Mosfilm. Before doing so, we asked Kodak to share with us information about the quality of this lab’s film processing to date. In response to our request, Kodak officials reported that Mosfilm regularly purchases ECN-2 chemistry for color negative film processing. This speaks indirectly to the stability of development, since chemistry must be constantly replenished. Furthermore, at the beginning of 2021, with the support of Kodak engineers, the laboratory revived the practice of monitoring the quality of the development using control strips. The developed film base color also indirectly confirmed the acceptable processing quality:
The film was scanned in the same Mosfilm lab, using the Lasergraphics ScanStation scanner in Cineon Film Log format. The raw scan was ‘printed’ in DaVinci Resolve with Kodak Vision Color Print Film 2383 in Dehancer Pro OFX plugin (no other Dehancer tools were engaged).
All digital sources were completely interpreted and graded with Dehancer Pro v.5.0.0 while two additional nodes were used for some minor corrections:
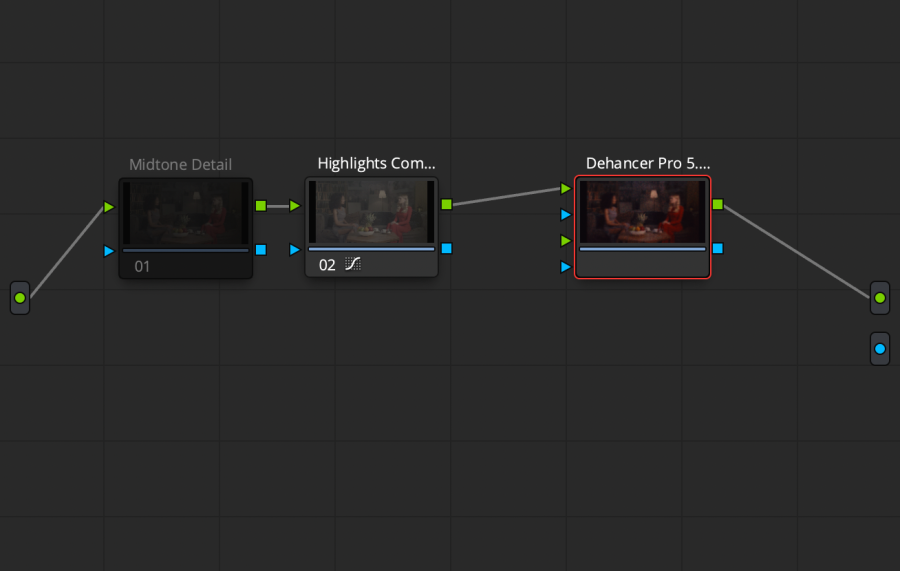
The first one is not essential. The only tool used in this node is Midtone Detail. It successfully imitates the barely visible edge halos usually produced in the emulsion layer by the development process. These effects are more prominent with the smaller film formats. So we just used the DaVinci’s built-in Midtone Detail tool to mimic this slight local contrast enhancement. Setting this parameter to 25 changes the image insignificantly, but improves perception at the subconscious level.
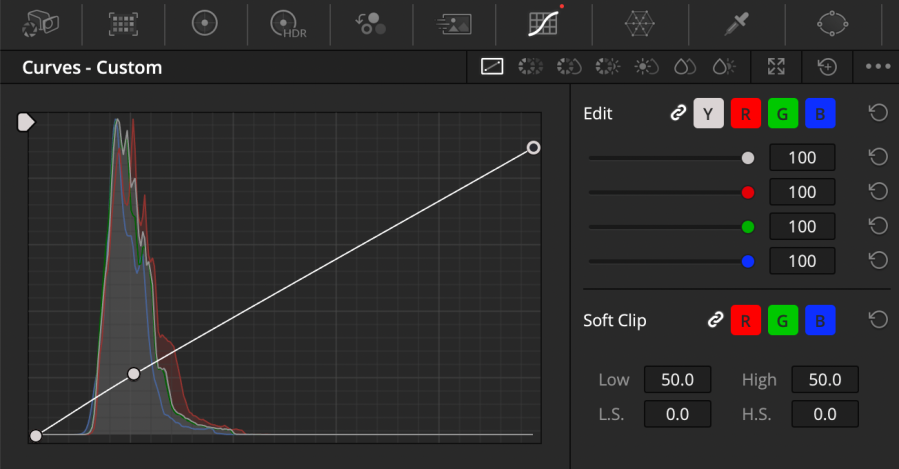
The second node is also optional, but desirable. It brings the additional highlights compression since Dehancer Pro 5.0.0, which is used for color correction in these examples, does not yet have the Highlights Compression tool, which we plan to implement in the future updates.
Please review the Dehancer Pro settings used for color grading of the RED Epic footage shot in IPP2 RWG Log3G10 (click to open the bigger images):
A haser machine was used to give extra atmosphere to the scene. Since the density and uniformity of the fog affects the color of the background, it additionally contributes to the differences between the footage.
As a sample for your own experiments you can download the .dra project archive with color correction applied to the original RED footage.
Download Dehancer Test 2021.dra.zip
You can download Dehancer plugin for DaVinci Resolve, Adobe Photoshop and Lightroom Classic on our website and get a free 2-week license to try it out:

